
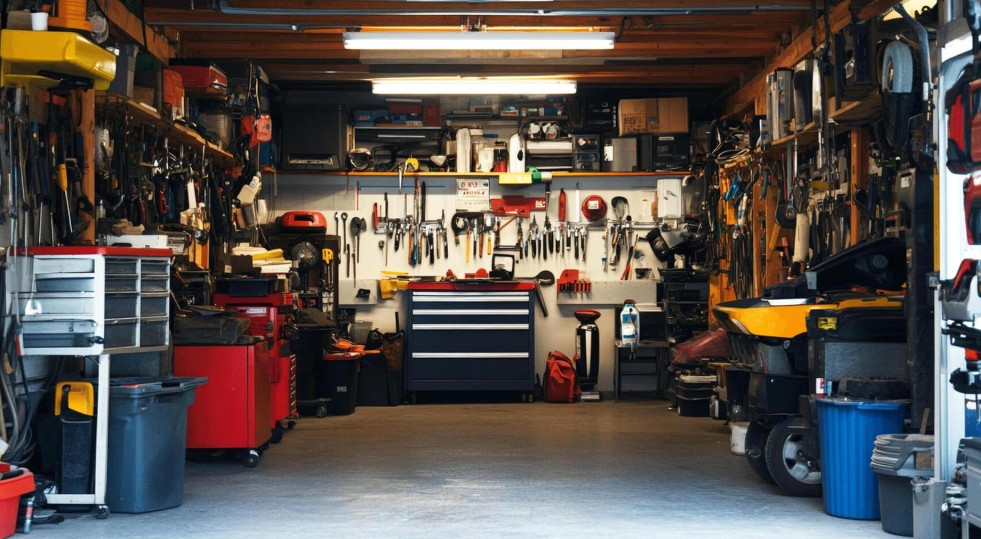

Many individuals pass by their garage daily without realizing its full potential as the best underutilized productive space within their household. An effective garage upgrade improves not only the overall organization but also eliminates the unseen environmental disruptions that can impact concentration, reduce the length of work time, and increase the perceived difficulty of certain tasks.
Table of Contents
The Cognitive Cost Of A Cluttered Garage
Even before considering shelving and lighting, we must consider your mind.
A 2011 research paper in _The Journal of Neuroscience_, authored by some of the Princeton Neuroscience Institute team, noted that various triggers present in the visual field simultaneously struggle for neural reflection – in other words, your brain space directly competes with physical clutter for your brain’s attention and energy. This is not about the aesthetic state. Each lost wrench, every pile of outdated boxes, and every container pushed into a corner talks you into using part of your attention, whether you understand it or not.
Visual disorder does not just look bad. It adds a tiny hit of low-grade cortisol to the performance anxiety you experience. You can’t shut it off by simply trying harder. The only solution to this interference is to get rid of the clutter and chaos that causes it – and it is the very first case for turning your garage into a workroom: not more room, but fewer distractions.
Starting With The 5S Framework
A garage transformation can be approached in a reliable way by applying the 5S methodology borrowed from lean manufacturing: Sort, Set in order, Shine, Standardize, Sustain. Industrial companies use this to maintain factory floors working at optimal performance, and we can use it for a home workspace since the main issue is the same – too many things for the available space and no particular organization where things should be stored.
Sort, pull everything out, and make decisions. If you haven’t touched it in a year and can’t point to a single job it did during that year, it leaves. This step sucks, but the space will be tight already.
Set in order, give every item left a permanent “assigned home” based on how often you use it. Daily-use tools go within arm’s reach. Monthly items go on the wall storage. Seasonal and bulky gear goes up in the loft.
Shine, clean the space properly. We mean not just sweeping, but degreasing the floor, wiping down all the surfaces, and starting from a truly clean baseline. Epoxy fits in here naturally: it’s durable, reflects light back into the room (don’t underestimate how important this is in itself) and takes about ten minutes to clean after a messy project rather than forty.
Standardize, create some simple rules to keep the workspace working. Label the shelves. Use the same size of bins everywhere. Put outlines on the tool board so a missing item is instantly noticeable.
Sustain is the really hard step because it’s not about work, it’s about being in the habit, not just for a Saturday this month but indefinitely. The only way the workspace works is if you keep using it and that will only happen if you don’t feel like you have a choice in the matter.
Reclaiming Floor Space With Vertical and Overhead Storage
Here’s the pattern we see in almost every garage: the floor is covered with bins, seasonal equipment, holiday decorations, camping gear, and large items that “don’t have anywhere else to go.” That single problem – floor clutter – is what prevents a garage from functioning as a workspace. You can’t set up a workbench if you can’t walk around it.
The solution isn’t to get rid of everything. It’s to move it up.
Slatwall systems mounted to the perimeter walls handle tools, cords, small equipment, and anything you want visible and within reach. They’re modular, they don’t eat floor space, and they keep frequently used items accessible without cluttering horizontal surfaces.
For heavier, bulkier seasonal items – bins of holiday decorations, camping equipment, roof rack accessories, sports gear that only comes out a few months a year – the ceiling is the answer. Installing a heavy-duty overhead lifting system is the most efficient way to store this category of gear. The E-Z Lift Pro garage storage lift system uses a motorized platform to hoist up to 8-foot platforms of bins and gear safely to the ceiling, bringing them down on demand without a ladder or a strained back. That class of solution is what actually frees the floor – not just shuffling things to one side, but genuinely removing them from the working footprint.
When the floor is clear, the options open up. A full workbench, a rolling tool cart, a dedicated desk for computer work, an area rug defining a clean task zone – all of it becomes possible once you’ve relocated the bulk storage overhead.
Designing The Workspace For Ergonomics
A garage workspace designed with ergonomics in mind will be more easily used for longer periods of time. The workbench at the wrong height will wear you out during every project. For standing work, 36 to 38 inches is the right range for most adults – low enough that you can lean into your work without straining your shoulders, high enough that you can keep your back straight. If you’re doing precision work that requires quite a few trips to take measurements or make adjustments to a manual or electronic system, you want the surface slightly higher. If you’re doing a heavy assembly that requires so much torque you basically have your entire body in the process, slightly lower.
Do not underestimate how using the wrong stool for a two hour assembly can make it take most of a week. Get a height-adjustable shop stool (with a real footrest, not just a lower ring) and position it so your elbows are reasonably close to a 90-degree angle with your hands on the work surface. Tool placement follows the same logic. The things you reach for most should be at shoulder height or below, on a slatwall panel or a pegboard directly in front of the workbench. Reaching overhead for a frequently used tool twenty times in an afternoon adds up to real physical fatigue. Ergonomics isn’t about comfort as a luxury – it’s about how long you can work before your body forces you to stop.
Layered Lighting For Sustained Work Quality
If the garage was only used to park cars, a single overhead fluorescent bulb would have been sufficient. However, if you plan to use this space as a working area where you will be reading measurements or working with color-sensitive materials, this will be insufficient.
The typical solution for lighting your garage workspace is a two-layer system. Ambient lighting is the first layer, which is lighting that covers the whole room. LED shop lights are recommended here as they offer a good color temperature of between 4000K and 5000K. This is a clean, daylight-balanced light that does not cause the eye fatigue that warmer bulbs do over long periods of time. It’s also a good color temperature if you are painting, working with colors, or detail-oriented in your projects. Try to ensure the ceiling is evenly covered with no dark spaces or areas.
Task lighting is the second layer and comes from high-lumen, adjustable fixtures mounted directly over the workbench or main work surface. This allows you to focus light exactly where you need it without having to light up the whole room. LED strips mounted under a shelf also work well. Articulating arm lamps come in handy as they can be moved to bring the light over to where you need it.
Poor lighting is one of those factors that degrades your work quality slowly and invisibly. You don’t notice your eyes straining until the session is over and you wonder why you’re exhausted. Getting the lighting right means you can work longer with better output.
Controlling The Environment Year-Round
Extreme temperatures can seriously affect your productivity, whether you’re trying to work in a sweltering 95-degree garage or freezing in a 30-degree one. Insulating the garage door and shared walls, as well as weather-stripping the side door, can help eliminate some of these problems. However, a ductless mini-split is the most efficient way to regulate temperature and can warm or cool your garage independently of your home’s HVAC system without requiring the installation of major ductwork.
If you’re looking for a less expensive option, a space heater with a thermostat can keep you warm in winter, while a wall-mounted fan can help keep you cool in summer and provide the necessary ventilation in the meantime.
In addition to making you miserable, extreme temperatures can wreak havoc on your equipment and materials. Computers and electronics degrade faster when they go through repeated heating and cooling cycles, wood warps, and adhesives loosen. Even your finishing products can act wonky in extreme temps. So, for the longevity of your stuff, a temperature-controlled environment matters.
Power, Connectivity, and Functional Zones
Garages weren’t designed to accommodate heavy electric loads. Before plugging in a compressor, table saw, or full-time computer rig, evaluate what the space will handle. Most garages are served by a single 20-amp circuit, which won’t suffice for multiple power tools. An electrician can rewire for new circuits where needed, relocate outlets that aren’t handy, and upgrade outlets and exterior lighting to GFCI-protected ones.
Cords get a bad rap. Ceiling-mounted retractable cord reels keep extension cords off the floor and prevent the inevitable tangling when you throw it back in the corner. Similarly, power strips with individual power switches let you kill the post-welding fume extractor without fumbling for the plug. These aren’t sexy additions, but they change the way your garage “feels” when you’re in it every day.
Most home Wi-Fi systems don’t push a solid signal out to the garage. A Wi-Fi range extender or mesh node slipped in near the entrance takes care of this for most applications. If you’re actually doing work, taking calls, or managing projects from the cloud in the space, it’s a must-have.
Lastly, define the workspace intentionally. A clean zone is for computer work, documentation, and anything where dust and contamination is a problem. A dirty zone is for cutting, painting, sanding, and finishing. These two areas need to be separated by enough distance – or a physical partition – that overspray and sawdust don’t migrate to the equipment you care about. Acoustic dampening panels on the walls between zones also reduce the sound bleed from power tools, which matters if the garage workspace doubles as a home office.
A well-zoned garage isn’t going to require any more space than you already have. It just requires intentional placement and the discipline to keep each zone to its purpose.
The garage sitting behind your home right now is not a storage problem waiting to be managed. It’s a workspace waiting to be built. The physical changes – overhead storage, good lighting, a clean floor, a proper workbench – are straightforward once you approach them systematically. What you get on the other side is an environment that doesn’t fight you, and that alone is worth more to your daily output than most other changes you could make.
