
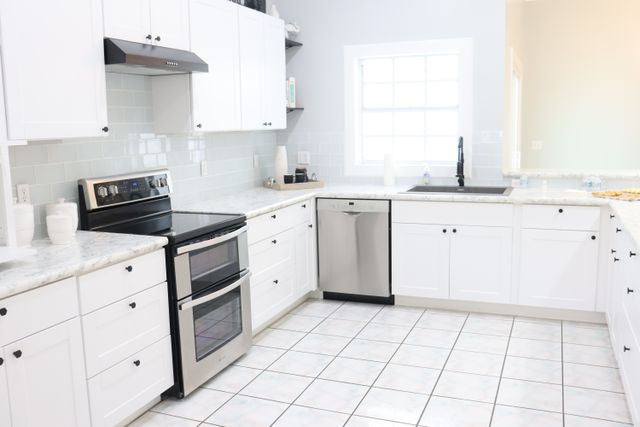

Most of the backsplashes that come out looking a bit off didn’t have anything go wrong during the tiling itself. The first problems usually show up twenty to thirty minutes before tiling begins: nobody thought through the layout, measurements were bad, the wall wasn’t checked. Get the planning part right and the tiling is just straightforward mechanical work. Skip it and you’ll be chasing problems across the entire wall.
This is a guide for someone wanting to do their first ever kitchen backsplash. It covers everything from measuring the wall to wiping off the grout haze – in the order you actually need to do it.
Table of Contents
Measure the Area and Order the Right Quantity
Before you start choosing samples or open a single tile bag, accurately measure the backsplash area. Multiply the width of the run by the distance from the countertop to the underside of the cabinets. Do this for each section separately, then add them together.
That number is your net square footage. Don’t order that number.
Add 10-15% on top as a waste factor. The extra covers cuts, the tiles you’ll snap on your first attempt with the cutter, and any pattern offsets that chew up more material at the edges. If you’re running a diagonal or herringbone layout instead of a standard brick bond, push that figure to 20%. Running short mid-job means ordering a second batch, which may not match the shade of the first.
Write the final number down and order that amount before you do anything else.
Prepare the Wall Before Adhesive Touches It
Improper cleaning and preparation of the substrate is the biggest time-waster – and one of the more common reasons for failure among newbies, who tend to underestimate its importance. The wall behind a kitchen backsplash is not as innocent as it looks. It’s a magnet for grease, moisture, filler patches, old adhesive residue, and the occasional cupboard screw hole. Tiles don’t adhere well to any of that.
So wipe down the wall with a degreaser, paying particular attention to the area behind the hob. Grease breaks the bond between the wall and the adhesive, and it’s invisible until the tile starts to drop off two years later. It’s all invisible at the time of fixing.
Fill holes or divots with filler. Let dry and sand flush. Hold a spirit level or a long straight edge flat against the wall and slide it around. You will be looking for hollows and bubbles. If the wall deviates over more than about 3mm within a smallish run (30cm or so), that’s lippage. That means one tile edge sticks out proud of the adjacent tile. It’s very difficult to fix that once you’ve started applying adhesive.
The surface needs to be clean, dry, flat, and sound. All four. Not three of the four.
Choose the Right Adhesive For the Tile and Location
There are two main adhesive families worth knowing about. Ready-mixed mastic is convenient and easy to work with. Cementitious thinset mortar is more durable, better for moisture resistance, and the correct choice for heavier or non-porous tiles near water or heat.
For standard 7.5x15cm subway tiles in a backsplash area that’s away from direct water exposure, mastic will do the job. For areas close to water or for larger, heavier tiles, you’d want to use thinset. While it takes a bit more effort to mix and work with, it’ll still be bonded properly in ten years.
One key point to notice: the Tile Council of North America handbook specifies a minimum of 95% mortar coverage on the back of interior wall tiles (TCNA). If the coverage is less than that, hollow-sounding tiles, cracked grout joints, and eventual bond failure will result. The correct adhesive, trowel, and technique are responsible for full coverage.
Plan the Layout Before Picking Up the Trowel
The step most beginners skip entirely is this one, and it’s the one that separates a professional-looking finish from one that draws the eye to the edges.
Dry-lay a row of tiles on a flat surface – the countertop works fine. Space them as they’ll sit on the wall, with spacers in place. See where the cuts land at both ends. If you end up with a sliver of tile less than half a tile width at one side, shift the starting point by half a tile. Awkward slivers at corners or window reveals look like an afterthought.
The classic layout for kitchen backsplashes is a brick bond – also called running bond – where each row offsets by half a tile from the one above. It’s the pattern most associated with subway tiles for good reason: it’s visually stable, handles cuts well, and draws the eye along the horizontal, which can make a kitchen with a low ceiling feel taller. Straight stack is cleaner and more contemporary. Herringbone uses more material but creates strong visual interest.
Tile colour and finish also play a role in how the space reads. Lighter tiles reflect more light and make the wall feel further away. Darker or richer tones create warmth and anchor the room. Something like green subway tiles works well in kitchens where the palette already includes natural tones – wood countertops, warm cabinetry, or stone flooring – because the green reads as a considered choice rather than a neutral default.
Mark your starting point on the wall with a pencil line and a spirit level. This line is your reference for the whole job. If it’s off by two degrees, every row above it inherits the error.
Apply Adhesive and Set the Tiles
Work in small areas, around a couple of feet square is a good size. Adhesive skins over as it dries so if you’ve applied too much and stretch to reach further you’ll just push tiles into non-tacky adhesive.
Use a notched trowel to spread the adhesive and create ridges. The size of the notch matches the size and type of tile – a 6mm V-notch or square notch usually suits subway tiles. Deep, heavy tiles require a more substantial notched trowel, generally 10mm or greater for a sufficient bed. Comb in a single direction at 45 degrees. Press the tile perpendicular to the direction you’ve combed in and let the ridges collapse and fill the voids. This gives you the best chance of full coverage.
Press each tile in and down with a twist, don’t push it from the side inwards as the adhesive will fill up the grout joint. Insert plastic cross spacers after every second or third tile. For subway tiles, 2-3mm spacers are standard. After every row check for lippage with a straight edge or at the very least a spirit level. Any tile that’s even a tiny bit too high should be pushed down and repositioned before the adhesive sets.
Cut Tiles to Fit Around Edges and Sockets
Use a manual snap cutter for straight cuts. You need to firmly score along the line and then just snap the tile. Scoring the tile too often weakens the cutting line and breaks the tile in the wrong place.
Cutting around electrical sockets requires a more complex approach. First, mark the socket’s position on the tile face. For an L-shaped cut, you need to score both lines. Next, snap the tile along one line. Finally, remove the corner by using nippers or a wet saw. It is better to rent a wet saw if there is more than a couple of sockets to fit your tile around.
Remember to cut the tile slightly outside the pencil line and check the fit before applying adhesive. The socket faceplate will cover any small gap but a tile that is too small cannot be made larger.
Grout and Finish the Job
Wait until the adhesive dries and cures before putting on the grout – you want to use the timing that the manufacturer recommends, but typically at least wait 24 hours. Put your hand on a tile; if it wiggles, wait longer.
With cementitious grout, mix it to a stiff putty and force it across the tiles with a rubber grout float held at around 45 degrees to the wall. Really squeeze the grout into each and every joint. Otherwise, you’ll leave a hole that wicks up water and stains.
Time-wise, get to sponging off the excess grout before it starts to set. Grout left too long just makes a haze you have to scrub forever. Wipe diagonally over the tiles when you’re cleaning the excess grout, rinsing frequently and working gently rather than scrubbing hard.
After the grout is good and dry, finish rubbing the last haze off with a clean, dry cloth. Some grouts and natural stone tiles should be sealed at this point.
Don’t grout at the countertop joint. That’s a movement joint. Grout is rigid and will crack there as the countertop moves with temperature and load. Use a colour-matched silicone caulk instead. Use it at the countertop, around socket faceplates, and inside corners, where it is barely noticeable.
Run a bullnose trim or metal edge profile along any exposed edge of tile – at a window reveal, the end of a run against an open wall, or wherever tile ends without turning a corner.
The Job is in the Preparation, Not the Tiling
All of the decisions are made before you even think about putting the first tile on the wall. It’s taking proper measurements, flattening the wall, using an appropriate adhesive, and planning your layout on paper. That’s what makes a backsplash beautiful. The installation is just carrying out what you’ve already decided.
