Your walls look terrible after painting, despite buying expensive paint and quality brushes. The problem isn’t how you painted. It’s because you skipped preparation and tried painting over walls that were completely unprepared. Paint can’t fix underlying problems. It just highlights them in the worst possible way.
Table of Contents
1. Wash Your Walls, or Nothing Sticks Properly
Dirty walls reject paint. Grease splatters, dust layers, smoke residue, mysterious sticky spots from who knows what. All of this prevents paint from bonding. Your walls might look okay initially then start peeling or getting blotchy because paint never actually stuck.
Kitchen walls especially need serious washing. Years of cooking grease build up in invisible layers. Areas around light switches have hand oil buildup. Bathrooms have soap scum and possibly mildew. All of this needs to be gone before paint touches anything.
Regular dish soap mixed with warm water works for most walls. Wipe everything down, let it dry completely. Painting damp walls traps moisture, causing blistering later. TSP cleaner handles really grimy walls but requires gloves and thorough rinsing. Most people don’t need to go that aggressive unless their walls are genuinely disgusting.
2. Fix Every Single Problem Before Painting
Paint doesn’t hide damage. It highlights it. Every hole, crack, dent, and gouge will show through, making your fresh paint look terrible. Fill nail holes, patch bigger holes, fix cracks, and address everything before primer goes on.
Small nail holes fill with spackling paste. Smear it in with a putty knife, let it dry, sand smooth. Bigger holes need actual patching involving drywall pieces and joint compound. This isn’t fun but skipping it means obvious holes showing through your paint forever.
Cracks need proper attention or they’ll reappear within months. Some cracks indicate serious problems beyond cosmetic fixes. Large recurring cracks might need Drywall Finishing Contractors assessing whether structural issues exist. Most cracks just need cleaning out, filling, and smoothing but occasionally they signal bigger problems worth investigating before you paint over evidence.
3. Sand Everything Smooth
Bumps, drips from previous paint jobs, and texture differences. All of this shows through new paint, creating an uneven surface that everyone notices. Sanding smooths everything, creating a uniform base. This single step separates okay paint jobs from ones that actually look professional.
Sand every repair until you can’t feel it anymore. Run your hand across it. Feel a bump? Keep sanding. Repairs should disappear completely to touch. If you can feel them, you’ll definitely see them after painting.
Sanding creates dust coating everything within a twenty-foot radius. Drop cloths protect your stuff. Dust masks protect your lungs because breathing fine particles is awful for you. Vacuum everything thoroughly after sanding, then wipe walls with a damp cloth. Paint sticks terribly to dust creating rough texture nobody wants.
4. Primer Isn’t Negotiable
Paint companies claim their products don’t need primer. This is marketing nonsense. Paint-and-primer-in-one works fine for minor color changes on walls already in decent shape. Everything else needs real primer or your paint job will look amateur no matter how carefully you apply it.
New drywall absolutely demands primer. Unprimered drywall soaks up paint unevenly, creating a blotchy mess even after three coats. Joint compound patches absorb paint differently than surrounding wall, showing repairs unless you prime first.
Covering dark colors with lighter ones needs primer, or the dark color bleeds through. Stains from water damage, smoke, or mysterious sources need special stain-blocking primer, or they’ll reappear through your fresh paint like ghosts haunting your walls. Regular primer doesn’t block stains. Get the right primer for the problem you’re solving.
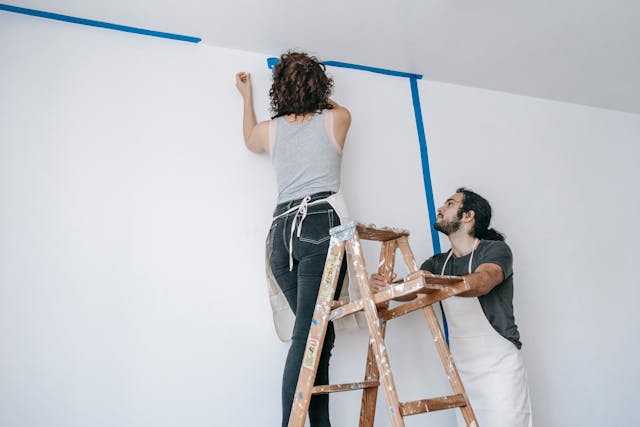
5. Protect Everything Else In The Room
Paint goes everywhere during application. Doesn’t matter how careful you think you’ll be. Remove outlet covers, light switch plates, door hardware, and anything that comes off easily. Tape edges where walls meet trim or ceiling using actual painter’s tape, not masking tape from your junk drawer. Painter’s tape removes cleanly without taking paint with it.
Drop cloths prevent paint from destroying your floors. Canvas cloths absorb drips instead of creating slippery puddles like plastic does. Plastic works covering furniture, but use canvas for floors unless you want to recreate an ice skating rink in your living room.
Taping takes forever and feels pointless until you’re cleaning u,p and everything protected stayed clean while everything unprotected got paint splattered on it. Then you’re grateful you spent the time taping instead of spending twice as long scraping dried paint off trim.
6. Stop Rushing Everything
Preparation takes serious time. Each step needs proper drying before moving forward. Spackle dries. Primer dries. Paint dries. You can’t rush any of this without creating problems that weren’t obvious until too late to fix without starting over.
Plan a realistic timeline, including all preparation, not just painting time. Professionals spend way more time preparing than actually painting because preparation determines whether the final result looks good or terrible. Rushing through prep to get to painting faster guarantees amateur results every single time.
Temperature and humidity affect everything. Don’t paint in extreme heat or cold. Avoid high humidity if possible. These conditions mess with how paint applies and dries, creating problems you won’t notice until the paint’s dry and you’re stuck with it.
Conclusion
Professional results require washing walls thoroughly, fixing every imperfection properly, sanding everything smooth, using appropriate primer, protecting everything else, and allowing adequate time for each step. Drywall finishing contractors spend their entire careers learning proper preparation because it matters more than anything else.
Skipping preparation steps guarantees paint that starts failing within months instead of lasting years. The actual painting part is honestly the easiest part once preparation is done right. Rush the prep, and your paint job will look exactly like someone who rushed the prep did it.
