Growing your own food in a garden is a wonderful way to connect with nature while also providing your family with fresh, nutritious food. You will, however, need to have the soil in your garden ready before you can start planting anything. The process of preparing the soil for a garden might be intimidating, but it is an essential stage in the gardening process. In this post, we will go through the many steps involved in preparing the soil for a garden.
Table of Contents
Step 1: Identify your Soil Type

The first thing you need to do in order to get your garden soil ready is to identify the sort of soil you have. There are many varieties of soil, each of which has its own unique features and potential effects on plant development. Sand, clay, and loam are the three primary varieties of soil that may be found. Sandy soil is notoriously difficult to rehydrate because of its rapid drainage. Clay soil, on the other hand, is capable of holding onto water but may be tough to deal with due to its density. The kind of soil known as loam consists of sand, silt, and clay and is often regarded as the optimal composition for the majority of plant types.
Dig a small hole in the middle of your garden and feel the earth with both of your hands to discover the sort of soil you have. The texture of sandy soil will be grainy, the texture of clay soil will be tacky, and the texture of loam soil will be crumbly and soft.
Step 2: Test your Soil pH

The pH level of your soil is another factor that plays a role in plant development. The ideal pH range for most plants is between 6.0 and 7.0. You may get a kit to test the pH of the soil from the garden center near you or you can buy one online. When testing the pH of your soil, be sure to follow the recommendations on the kit.
Lime may be added to the soil in order to increase the pH of the soil if it is too low. You may reduce the pH of your soil by adding sulfur if it has an excessively high level. For the right application rate, be sure to follow the directions that are printed on the packaging.
Step 3: Clear Weeds and Trash
Before you can even begin to work on preparing the soil, you have to clear the garden bed of any weeds, rocks, or other debris that may be there. It is crucial to get rid of any weeds that may be present before planting since they may compete with your plants for nutrients and water.
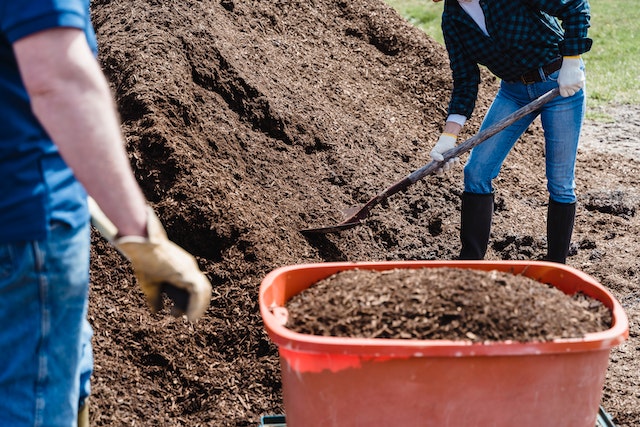
Step 4: Include Organic Matter
The structure and fertility of your soil may both be improved by the addition of organic matter. The terms “compost,” “manure,” “shredded leaves,” and “grass clippings” are all examples of organic matter. Your garden bed should have a layer of organic matter spread over it, and then you should use a garden fork or a tiller to incorporate the organic matter into the soil. It will make your organic soil more fruitful.
The kind of soil you have will determine the quantity of organic matter that you need to add to it. If you have sandy soil, you’ll need more organic matter than if you have loam soil. Your goal should be to add between one and three inches of organic matter to your garden bed.
Step 5: Add Fertilizer

Fertilizer gives critical nutrients to your plants. There are both organic and synthetic fertilizers available for your use. Compost, bone meal, and blood meal are all examples of organic types of fertilizer. Synthetic fertilizers are derived from chemicals and are designed to provide a certain balance of nutrients to the soil.
Before you start applying fertilizer, you should read the directions on the package to determine the appropriate application rate. You have the option of mixing the fertilizer into the soil or spreading it out evenly across your garden area.
Step 6: Till the Soil
As you till the soil, you are helping to break up any clumps of dirt and incorporating organic matter and fertilizer into the soil at the same time. To a depth of six to eight inches, loosen the soil by working it with a garden tiller or a garden fork.
It is important to avoid over-tilling the soil since doing so might destroy the structure of the soil and kill off helpful microbes.
Step 7: Level the Dirt
When the soil has been tilled, the surface should be leveled using a rake. If you have a surface that is level, planting and watering your garden will be much simpler.
Step 8: Water the Ground Well
When it has been prepared, the soil should be thoroughly soaked in water. This will help the soil settle, and it will also guarantee that the organic matter and fertilizer are dispersed uniformly throughout the soil.
Step 9: Give the Ground Some Time to Relax
When you have finished preparing the soil in your garden, you should wait at least a few weeks before planting anything in it. Because of this, the organic materials and fertilizer will be able to longer time for the material to decompose and become accessible to your plants.
Step 10: Consider Soil Amendments
It is possible that you may need to apply more soil amendments, but this will depend on the kind of soil you have and the plants that you want to cultivate. For instance, if you have clay soil, you may want to consider adding sand to the mix in order to increase drainage. Clay could be something you want to include into sandy soil in order to improve its ability to hold onto water.
Gypsum and perlite are two more types of soil additives that may be used. Gypsum can assist break up clay soil, while perlite can increase soil aeration. Do some research on the exact requirements that the plants are looking for in order to discover whether or not the soil need any further amendments.
Step 11: Engage in Regular Soil Maintenance Practices

It is essential to engage in regular soil care after you have gotten the soil in your garden ready for planting and have established your garden. This may include monitoring the soil pH on a regular basis, providing more organic matter or fertilizer during the growth season, mulching around your plants to help retain moisture, and adding additional organic matter or fertilizer during the growing season.
It is best to avoid stepping on the soil as much as possible since doing so might cause it to get compacted, which in turn makes it more difficult for plants to develop. Make entry to your garden easier by using stepping stones or a specially designed walkway.
In conclusion, preparing the soil for a garden may seem to be a challenging undertaking, but it is an essential stage in the process of growing a prosperous garden. You will be able to provide a wholesome and nutrient-dense growth environment for your plants if you adhere to these measures and take into account the unique requirements of both the kind of soil you have and the plants that you want to cultivate. Always keep in mind the importance of doing continual soil management if you want your garden to flourish throughout the whole growing season.
